expr:class='"loading" + data:blog.mobileClass'>
Showing posts with label Quad City. Show all posts

Thursday, April 24, 2014

What colors NOT to wear! By: Kelcy Hanson of Sweekit Photography


What may be popular in style may not be the most popular if you are getting your child’s pictures taken or family pictures. As a photographer, I want your child(ren) to look the best in the photos that you are going to be hanging on the wall. It is hard to know what looks best on your child so here are a few suggestion:


     What color of eyes does your child(ren) have? Eyes can play a huge role in what colors look best on kids! If you really want them to stand out, you can either choose to dress the child in the same color (blue shirt to pull out blue eyes) or choose the color opposite on the color wheel. Same goes with hair color-- if the child has red hair, typically greens look best and really make the red hair stand out!

     What kind of skin tone does your child(ren) have? Some colors tend to really wash out a person so be cautious to find colors that compliment, not clash :) If the child has fair skin and blonde hair, a pale pink outfit might not compliment their skin as well as a darker pink/coral color!

     Instead of the ‘hot’ neon colors, choose a few of the following-- Mint green instead of lime green; coral pink instead of bright pink; pale yellow instead of neon yellow, etc.
 

     Neutral and timeless colors and styles will always photograph the best and stand the test of time.

     Patterns, colors, oh my! Keep it simple-- too much distraction with the clothing takes away from the beautiful face of your child!


This season, neon colors are very popular! They look super adorable on kids and neon is everywhere! Unfortunately, the camera doesn’t have the same love relationship. Neon tends to have negative effects on skin tone and the true color of neon is very difficult to capture through a lens. Easy to see to the naked eye, but very difficult for a camera to ‘see’. When neon is photographed, it also leaves a color cast on the person’s face/neck/arms.


Also, contrary to what you see a lot, another color to avoid is wearing all white. Although it is a great color to look all uniform as a family, white reflects every color around it. Just slighting changing a child’s outfit from white to an off-white or cream color can make a huge difference!


Hopefully these tips will help you pick out outfits for your next photoshoot! Next, I will be writing a few tips on how to dress your family for a cohesive look!


(Stock photos from Crazy 8 clothing store, www.crazy8.com.)
Read more ...

Sunday, February 16, 2014

Enter our latest Giveaway!!!

Well friends, we rolled past 1800 fans...holy cow!!! Big thanks to all of you who share us with your friends and family, it means the world! Soooo, to show our appreciation, let'...s do a giveaway!

This time we are giving away one of our Maternity Sashes (a $30.00 value!) If you aren't expecting you could give it as a gift, tell your friends who are or use as a prop if you are a photog.


 All you have to do is "Like" this post, "Share" this post and then "Comment" below with 3 of your friends names. Easy Peasy right? The more names you comment with the more entries you will have! Also check our Twitter, Instagram and Blog for more ways to get your name in the pot.

Winner will be chosen on Sunday Tuesday!

Ready, Set, Go!
Read more ...

Tuesday, February 11, 2014

Eyebrow 101 with Brittany Chevelle, Quad City Make up Artist


One of the biggest beauty trends right now is full, natural brows. Say good-bye to those over-plucked, thin brows. Thick is in! And for good reason too.

Full brows give the illusion of a more youthful appearance; but they also frame your face, and accentuate your makeup.

You may be growing your brows out as you read this, and if so, I highly recommend visiting a brow expert/brow bar to give you a natural-full shape. In the meantime, here’s a quick an easy way to fill your brows in and fake a full look!

 First, decide if you are more comfortable using a brow pencil or brow powder. Typically, brow powders will give you a softer, natural look and are great for filling in sparse brows. I prefer to use both products because the pencil will give a clean precise line, whereas the brow powder gives a diffused look. When picking out colors, if you are blond, choose a color that best matches your roots. Generally, two shades darker than your hair color. If you have brunette or black hair, I recommend choosing a color that best matches your hair color, or even one shade lighter. You don’t want to look like Oscar the Grouch! ;)
Additionaly, will also need: an angled brow brush, spoolie (brow brush, or you can use a new toothbrush), concealer and highlight power.

Before you begin to fill in your brows, you need to determine your natural shape. So grab your brow pencil and brow brush, and stand in front of a mirror. First, to find the start of your eyebrows, place the brow brush vertically, against the edge of your nose, from nostril up to your brow. Then, using the brow pencil draw a small light dot. That is where your brow should begin. Next, to find the arch of your brow, place the angled brush again on the outer edge of your nostril, angled upwards and out, lining up just with the outer part of your pupil. Again, make a small dot just at the top of your brow. To find where your brows should end, you will use the brow brush to line up the edge of your nostril, with the outer corner of your eye. Place a small dot at the end.  Repeat with other eye.

Grab your brow pencil, and underline the underside of your brows. This part should be more defined. Then, using the arch point you found earlier, draw from the dot, down to connect with the end of the underside line.  You should now have the outer part of your brow out-lined. Next, take your brow pencil and using the powder, begin to fill in the out-lined area, using light brush strokes. Gradually,shading  the pigment into the inner part of your brow. If you need to add more brow powder to the start of your brows, be sure that tap off any excess. You do not want this area to be to dark, or harsh. Then, using a spoolie, begin to brush through your brows to blend the colors.


You may skip this next part, but to get that precise, groomed brow look, I like to use a lighter concealer to the underside of my brows to finish off the look.This will highlight the brow bone and give a nice clean brow line. You may also add a shimmery highlighter to the brow bone to really make it pop!


Read more ...

Monday, January 20, 2014

Top 11 Easiest Ways to Update your Home; by Illinois Interior Designer, Sherri Scott


My husband and I lived in our first home for nearly seven years.  Since we had originally thought we would be there for three to five I didn’t want to make any huge changes that may not work in a new home.  I sat tight for a while but grew a tiresome of it.  I decided certain rooms needed freshening up and made a few changes along the way.

 Home decorating can be a bit overwhelming.  There are so many different components that make up a room and the thought of going out and tackling it all can make you a bit batty; to be honest it can be challenging to find the time and money to do it all at once.  There are a number of ways to make small changes that result in a big impact without breaking the bank and taking forever.

 
1.      Don’t forget your front entrance makes a first impression.  Consider switching out your door color for a deep red or strong black/charcoal.
 
http://www.benjaminmoore.com/portals/bmps.portal?_nfpb=true&_br=1&_pageLabel=fh_home&np=public_site/articles/curbappeal_articles/CurbAppealExp

2.      Since we are already outside, go ahead and pull some planters out of the shed and do a few container flowers gardens to create a welcoming entrance.  It doesn’t have to be as plentiful as the picture shown, but be sure to add great colors to complement your entrance.
 
http://www.bhg.com/home-improvement/exteriors/curb-appeal/ways-to-add-curb-appeal/#page=6

3.      Paint is usually the first thing that comes to mind.  All it takes is a weekend and a gallon of paint and you can update your room automatically.  Don’t be afraid to add an accent color or (with a little patience) even an allover stencil like some found here will add a dramatic punch. In a small space even wallpaper can be an inexpensive change and the wallpaper nowadays is certainly not your grandmother’s wallpaper!

4.      Since we are on the topic of paint, why not paint an old piece of furniture you have and bring new life to it.  It can be a fun, bold color and create a focal point in your room. 
 
http://www.bhg.com/decorating/color/colors/decorating-with-color-expert-tips/#page=28
 
5.      Switch out your pillows!  There are so many accent pillows out there (shown above) and are easy to change out to test what works in your room and what you like best.

6.      DECLUTTER!  Sometimes it is best to start with a clean slate and pull out your accessories one by one and find new homes for vases, pictures, flowers, etc.  You may free up some wall space and create a gallery wall, which can include photos, children’s artwork, ironworks, plagues and more.  The sky is the limit.  I will be creating a new gallery wall in our hallway in the near future so stay tuned.

7.      Reupholstering seat cushions at your dining room or breakfast nook is a fun way to add texture and pattern.  This is a simple DIY you can do over day or weekend.

8.      Turn on a new light…or lampshade.  You can change out the complete lamp or simply shop around for a new shade.  So easy to switch out.  I have seen some great ones at Target and Home Goods.

9.      Find new window treatments! In our old house I had a neutral linen window treatment hanging in our front room.  I loved them but was looking for some pattern for new look so I switched them out with some multicolor patterned ones instead and moved the neutral ones to our bedroom and viola, two rooms were renewed.
 
 http://www.westelm.com/products/pinwheel-linen-window-panel-stone-white-slate-t533/?pkey=cwindow-panels-curtains-shades&cm_src=window-panels-curtains-shades||NoFacet-_-NoFacet-_--_-
 
10.  Change out those accessories.  I have so many frames, vases, and candles that get moved around every so often.  Sometimes they find a new home in another room or simply get placed in storage.  Also update the photos in the frame after all, that is why we take so many pictures, right?  So we can enjoy them!

11.  Decorate your mantle seasonally.  The obvious time to do so is at Christmas time, but you can do it year round.   If you are like me then come February I am looking forward to spring arriving and what better way to get a pick me up then by changing out the seasonal décor. 
http://www.hgtv.com/decorating-basics/decorate-your-mantel-year-round/pictures/index.html
  
They sky is limit when it comes to revitalizing a room that is starting to feel a bit stale.  Above are just a few to consider alone or changes to do altogether.  What are some things you have done to update your space?

Blog post by: Sherri Scott
                       Illinois Interior Designer
Read more ...

Wednesday, January 15, 2014

Top Toys For 2013 (in my house anyway!) By Lindsay Asta

 
What's your child favorite toy? We have a wide range of children in our home so we have lots of favs. Here are a few off our list for 2013...
 
Wall Tracks by Hot Wheels
Have you tried these out yet? We were a little nervous they would ruin our walls, but they don't damage them a bit. They adhere with command wall strips which make them very easy to remove from the wall and stick back up in a new location. Great for any age too.
 
 
Minecraft, a new obsession for all ages! This is a video game I am actually OK with. My 7, almost 8 year old, builds houses and creates rather than the usual mindless fighting games.


Books! Not just any books though, joke books, instructional and character encyclopedias are all the rage here. For my boys, 7 and 4, these are the best. They both get into them and will spend an hour interacting with each other, not fighting!


Doll stroller and accessories. Do I even need to say any more...doll anything=LOVE. You obviously need a great baby to go along with all the accessories, my little one's (2years old) current favorite is Baby Alive. Ya know, the one we had growing up? She's still around and just as awesome as you remember. LOL! We opted to get her the one that just drinks her bottle and wets rather than the one that eats and dirties her diaper. 


Play food, utensils, pots and pans and the play kitchen. We especially love the Melissa and Doug wooden products. They are so durable and the kiddos LOVE them!


Do you or your children have a tablet? My 7year old got a Kindle Fire last year from Santa and it is great for him and even works pretty well for my 4year old, however not the case for my 2year old. She was unable to navigate to the right screen and was always frustrated even with assistance. So Santa brought her the Nabi Jr and she (and I) love it! It is the right size for her little hands and has a rubber casing so she cannot easily brake it. The device also comes with tons of games, books, and videos all downloaded and ready to go.

 
I have a serious love hate relationship with one item on this list, and this is it! The kids love it because the track is up a little higher so they can get to everything with ease. It is also a great to keep the track together so the will actually use it rather than make you rebuild daily. Here's where the hate part comes in...it does come apart easily, and it is time consuming to rebuild once multiple pieces have been removed. The solution you ask? Wood glue, and LOTS of it! I glued the pieces together and my life is now complete.

 
Need a large motor skill toy for your little ones during the winter months or rainy weather? We love ours! Very durable and easy to clean too.


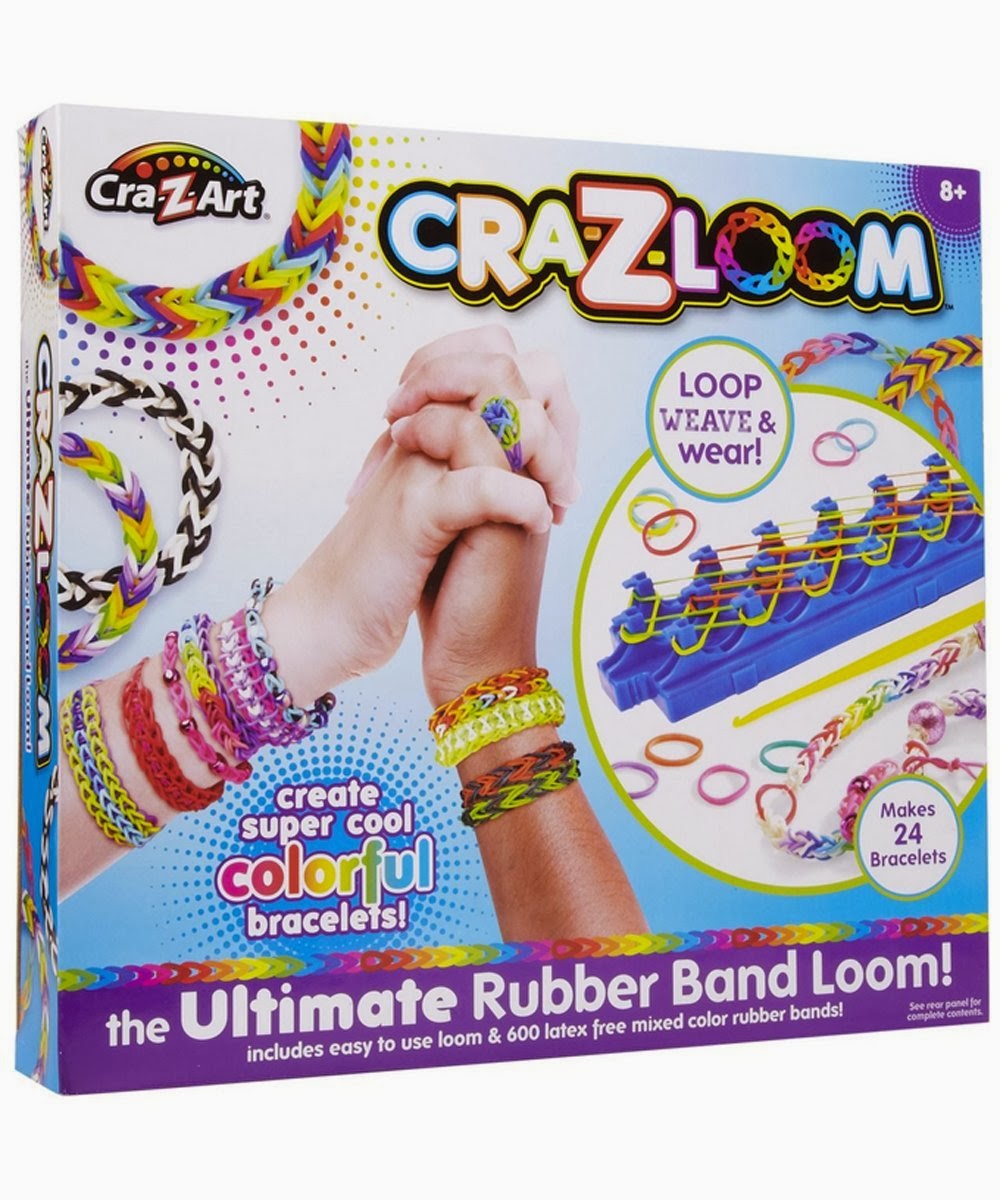
  Fun for the whole family! Even my boys are super into this bracelet craze. With a little help from an adult all 3 of my kiddos can make multiple designs. I have to admit, even I have made some just for the fun of it.
ANYTHING Despicable Me 2 or Minion items

 
A workbench or tools of any kind. Boys and girls alike love to work on things. They also love to care for their toys, friends or animals, so a dr kit is another hands on fav!


Super Hero anything!!! But in particular, these fun "hideouts".


Hope you enjoyed our top toys of 2013! Feel free to comment with yours below, we always love hearing about new products!!!

Read more ...

Tuesday, January 14, 2014

What your missing in your DAYTIME skincare routine by Brittany, QC Makeup Artist

With the copious amount of skincare and makeup products on the market today, it's no surprise that women aren't sure what products to buy, or how to use them...correctly. I know it can be very intimidating, confusing, and leave you running for the door, but fear not, here is a simple step-by-step guide to caring for your skin. No matter if your oily, or dry.

The order in which you apply your skincare products will make the difference of how effective or not effective it can and will be for you.

Starting with your morning routine:

1. If your skin is more normal to dry, a simple warm water rinse would be adequate; assuming that you also cleansed your skin at night. However, if you are more oily and acne-prone, you will want to cleanse your skin in the a.m. regardless. Always cleanse with warm water and never use hot water on your skin. Even for those of you that enjoy hot showers. Just. Don't. Do. It. This will cause a slew of other skin issues.

2  After cleansing, your next step will always be eye cream. You may have the same eye product for both a.m. and p.m. or, two separate products. For example: my a.m. eye cream has SPF in it to give that delicate eye area extra protection from the sun which causes premature aging. The skin around the eyes is much thinner and has fewer oil glands, therefore drying out quicker and accentuating those fine lines. A hydrating, rich eye cream can help. A little goes a long way, so apply half a pea-size to the pad of your ring finger, rub between your two ring fingers, and tap lightly around your orbital bone. Never pull outward and never apply toward the lash line, as all eye creams migrate upward and can cause burning in the eye.

3. The next product you might apply is an anti-aging serum, or acne product: depending on your skin concerns. This is typically a very sheer, thin consistency. For me, I use a hydrating booster that also has anti-aging properties like, vitamin C. If you are more acneic, you might use a benzyl peroxide or salyclic acid treatment at this step.

4. And lastly, your moisturizer. This will lock in moisture and drive all those yummy ingredients in your serum deeper into the skin. If you opt for a moisturizer with SPF, you will be done at this point and can begin with your makeup regime. Some people use the same moisturizer for the am and pm, and if that is the case, you will want to buy a SPF specially for the face to apply after you have applied your moisturizer, and so applying your SPF will be your last step.

The easiest way to remember this, is that your want your SPF closest to the sun so it will always go on last. Make sure to look for a product that has a SPF 30 or higher, anything lower than that will wear off before you even get out of the door. Oh, your makeup has SPF so your good to go, right?! That's just a myth. Unless you apply your makeup like Spackle, then your good to go. :) 

Post by Brittany C
QCA Makeup artist
Thanks for reading, and if you have any questions or comments, please post here or on my site at www.facebook.com/brittanychevellemakeupartist

Read more ...

Wednesday, January 1, 2014

Cheers to 2014!!!

I have had a great 2013 and I'm looking forward to making 2014 even better. Not only personally but for TCOT. We have grown a lot in the last 12 month and are looking forward to keeping up the momentum!!!

Here are some of the best TCOT moments of 2013 (in no particular order)

10:
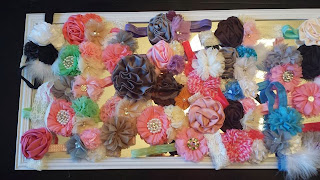
                                               TCOT Headbands/Clippies;

 It's what helped put us on the map and a major creative outlet for Lindsay and I.
We are so fortunate that some of the best photographers around have shared their photos with us. Photos below by Stephanie Michelle Photography and Shelby Resler Photography. Headbands by TCOT

www.thecherryontopqc.storenvy.com


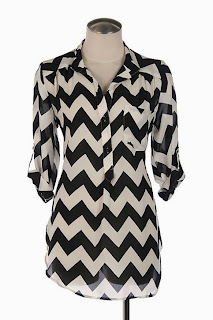
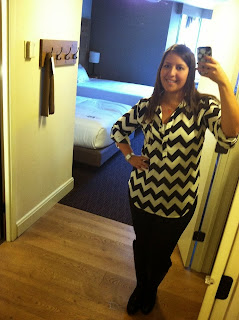
9.  THE CHEVRON TUNIC (nuff'said)
www.thecherryontopqc.storenvy.com

www.thecherryontopqc.storenvy.com

www.thecherryontopqc.storenvy.com

We have had trunk shows at Peachwave frozen yogurt, Jennifer Jayne's studio, a Bettendorf Wine Bar, Sweekit Photography's studio, not to mention Weekly local pick ups!!!
We have had a blast getting to know our local customers!!!


We had some seriously adorable models!
Photos by Stephanie Michelle Photography


www.facebook.com/thecherryontopqc


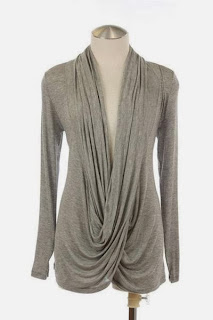
5. The Drape Sweater!!!
A huge hit for women of all ages and sizes.
www.thecherryontopqc.storenvy.com

www.thecherryontopqc.storenvy.com


4. Our Annual Cutest Kid Contest!!!
Winner this year!


www.facebook.com/thecherryontopqc

3. Our Women's line photo shoot with Sweekit Photography!
www.thecherryontopqc.storenvy.com

www.thecherryontopqc.storenvy.com


3.  SMALL BUSINESS SATURDAY craziness!!!


2. Holiday Dresses for Girls and Women!!
Too much fun to help design and purchase!!
Many to choose from here:
www.thecherryontopqc.storenvy.com

www.facebook.com/thecherryontopqc

1. OUR CUSTOMERS!!!
We love meeting and seeing all of you at our events.
We love to hear from you on fb or email too!!!
It feels like we have 1700 NEW friends!
THANK YOU FOR A GREAT YEAR!

www.facebook.com/thecherryontopqc


Read more ...