expr:class='"loading" + data:blog.mobileClass'>
Showing posts with label QC Makeup artist. Show all posts

Thursday, April 24, 2014

10 MUST HAVE Makeup Brushes by Brittany Chevelle; QCA MakeUp Artist


                                               Brittany's 10 MUST-HAVE Makeup Brushes


Before I get started, let tell you a little secret from the pros: You do not need every brush that is on the market. There are 10 brushes that are essential to your makeup kit. Believe me, the rest of the brushes are wonderful to have, but with these 10 brushes, you will be able to recreate any look! :)


                                                                    FACE BRUSHES


1. Large Powder Brush-  Great to dust loose/compact powder/minerals all over the face and body.  This brush is very full, softly rounded, and will give you sheer coverage. Perfect for setting liquid foundation with a light-weight powder.


2. Blush Brush-  This brush is very versatile as you can use it to apply blush, bronzer and/or highlighter. You can purchase a rounded or angled blush brush, depending on your preference.


3. Foundation/concealer brush-  This is great for spreading a liquid/cream foundation over the skin to get a flawless finish. You may also use this brush to apply a moisturizer, a primer, concealer or even cream blush. Just be sure to clean the brush if you plan to use it for foundation and blush, or you may consider buying two of these brushes, one for each product.


4. Mixed Fiber Flat Brush – This is one of my favorite brushes. I love to use this brush to apply my liquid primer and liquid foundation for an airbrushed, flawless application. It is also a great choice for those who love to contour and highlight as it can be used dry to blend powders and/or creams. This is also a wonderful choice for mineral powder lovers. Just use in place of your buff/kabuki brush.


                                                                     EYE BRUSHES


5. Small Shading brush – This brush is great for applying eyeshadows to the eye lid or crease because it deposits concentrated color to area it is applied.


6. All Over Brush-  This brush deposits sheer to medium coverage and is great to use all over, and may also be used in the crease for a softer look.

*Depending on the desired look, you may use either brush in the crease. The small shading brush will give you a more precise/defined crease.


7. Blending Brush-  This brush is great to use without any makeup, to blend and soften lines of applied eyeshadows. You may also use it to apply eyeshadow for a sheer wash of color.


8. Fine Tipped Eye Liner Brush – This is perfect for liquid or cream liners to create a defined look. ex. Cat-eye or winged-liner


9. Angled Brow Brush-  This brush is great for powder or creams. You may also use it to soften the look of brow pencils.


10. Lash comb/brow brush- This brush is great to sweep through the brows, blending any shadow or pencil lines, and shaping unruly brows.

I like to apply my mascara, comb through with the wand, let the mascara dry and then reapply. This is the BEST way to get fanned out lashes, with volume and no clumps. :)

 
Invest your money is good quality brushes, quality over quantity. In this case, less can be more!

 
Here are some prestige brush brands that I recommend: Make Up Forever,  Bobbi Brown, MAC, Obsessive Compulsive. You can find these at Sephora, Department Stores, and online.

If you aren't ready to make quite the investment just yet, but want to use some good quality brushes, I also recommend Sonia Kashuk, Real Techniques, EcoTools, and Sigma. Most of these you can find at Target or Drugstores.

(Most pictures were found on Sephora.com)
Read more ...

Friday, March 28, 2014

Meet the Woman behind the Makeup Brush! Brittany Chevelle, QCA Make up Artist

Let's get to know a little more about our favorite makeup Artist, Brittany Chevelle!!!
To find out more about Brittany, check out her fb page HERE


What inspired you to start in your field? How long have you been at it?

The creativity and expression that makeup artistry offers, just to each person doing their own makeup. I loved being able to share my passion and knowledge with women who had never been taught these skills, or had the interest in wanting to use makeup but not sure how to apply it, and what products to purchase.

 
I have been in the field professionally for over 6 years, but using my creative skills for about 10.


What has surprised you about your career?
 
That you never will know everything there is to know. You can always learn more skills, and because it is such a creative process, you can appeal to all kinds of kind people. And that's the great thing about this field, is that I get to meet people from all kinds of backgrounds and diversities.


What has surprised you about becoming a mother?
 
 I was surprised at how fast time goes by. How your wants and needs change completely, and you make sacrifices, and sometimes give up the things you once enjoyed, so you can spend more time with your child. I don't spend an hour primping myself each day like I used to. I loved that "getting ready" time, but now I realize that their are more important things that have to be done. Now, I might do my makeup and hair once a week! haha


What are some of your favorite mom duties? Least favorite?
 
I love teaching my daughter through songs, books, and everyday moments. I try to use every day occurrences as lessons. My husband and I sing what we are doing, or narrate everything we do! haha

I would say, meal preparations are my least favorite. I like to feed my family home-cooked meals, so it's important to me to plan them. However, it's not always my favorite chore.

 
What do you love about living in the QCA?

I love the big city-small community feel. Everyone here is connected somehow, through someone that you know. It's pretty amazing. We have so much to do here, and ways to connect with others.


Who/what inspires you?
 
My husband is my biggest pusher. He wakes up ready to start the day and get things done. I, on the other hand, need to wake up for at least an hour! haha He really is such do-er. I can say without a doubt that he has motivated me in every possible way to be better and do better.

 
What is one of your favorite childhood memories associated with your field?

(example: learning to do make up with mom, decorating your room)

So most people don't believe this about me, because I always have my makeup on and hair done (always before having kids!) but I was such a Tom-boy.

I didn't wear much of any makeup until my later years of high school. You couldn't even catch me in a dress growing up. I climbed trees, fell out of them, played football with the boys, and ran around our farm barefoot.

 
What do you do to "feed your soul?"
 
Books and art. I love a good book, and most often will finish them within days of beginning them. One of the biggest reasons I love my career is because I am able to express myself through my work, because to me, a face is a canvas, and I get to share that joy with a client when they love how they look.


What kind of advice would you give to someone who is interested in starting a career in your field?

I think real world experience and education are great tools. The more faces, especially faces of all shapes/size/age/ethnicities you can touch, the better you become. It's not about how much makeup you own, or if its the best brands. You have to invest in a solid kit, learn new techniques and trends, and apply them.

 
Can you tell us some of your favorite blogs to read?

I enjoy "A bowl Full of Lemons" for her great organizational skills and printables.

I also really like "Six Sisters Stuff" for their recipes.

Anything that will help me become a more organized person, and has great recipes! :)
Read more ...

Friday, March 21, 2014

The Perfect Winged Liner Tutorial by: Brittany Chevelle; QCA Make up Artist


How to achieve the perfect winged-liner


When it comes to eyeliner, most women tell me that they are afraid to use liquid liner, or to even try the  cat-eye look. Mostly, because one line is thicker than the other, longer than the other, or one points up and the other.. is pointing down.
 
Lauren Conrad always has flawless Winged liner


 My first tip is to use a kohl liner before applying any liquid liner. That will come later.

Before you apply your kohl liner, you want to decide where you want your wings to end. You will start by placing a little dot where you decide you want the wing tip to end. From there, you want to draw a straight line from the outer corner of the eye to the dot. Some artist choose to use a piece of tape or toothpick to create a straight line from your two points.

Now, you will line your upper lash line. Instead of trying to line the entire eye in one movement, you may find it easier to first line the inner corner to the middle lid, then start again from the middle and connect it to the wing. (I like to start with a thin line at the inside corner of my eye, and gradually make the line thicker until I reach the point of my wing. This will give you a more “cat-like” appearance.)


You may stop at this point and apply your mascara. If you are wanting a dramatic, bold cat-eye, then trace over the kohl eyeliner with your liquid liner. Now you have perfect liquid liner!

Another Celebrity that has nailed the winged liner

Read more ...

Tuesday, February 11, 2014

Eyebrow 101 with Brittany Chevelle, Quad City Make up Artist


One of the biggest beauty trends right now is full, natural brows. Say good-bye to those over-plucked, thin brows. Thick is in! And for good reason too.

Full brows give the illusion of a more youthful appearance; but they also frame your face, and accentuate your makeup.

You may be growing your brows out as you read this, and if so, I highly recommend visiting a brow expert/brow bar to give you a natural-full shape. In the meantime, here’s a quick an easy way to fill your brows in and fake a full look!

 First, decide if you are more comfortable using a brow pencil or brow powder. Typically, brow powders will give you a softer, natural look and are great for filling in sparse brows. I prefer to use both products because the pencil will give a clean precise line, whereas the brow powder gives a diffused look. When picking out colors, if you are blond, choose a color that best matches your roots. Generally, two shades darker than your hair color. If you have brunette or black hair, I recommend choosing a color that best matches your hair color, or even one shade lighter. You don’t want to look like Oscar the Grouch! ;)
Additionaly, will also need: an angled brow brush, spoolie (brow brush, or you can use a new toothbrush), concealer and highlight power.

Before you begin to fill in your brows, you need to determine your natural shape. So grab your brow pencil and brow brush, and stand in front of a mirror. First, to find the start of your eyebrows, place the brow brush vertically, against the edge of your nose, from nostril up to your brow. Then, using the brow pencil draw a small light dot. That is where your brow should begin. Next, to find the arch of your brow, place the angled brush again on the outer edge of your nostril, angled upwards and out, lining up just with the outer part of your pupil. Again, make a small dot just at the top of your brow. To find where your brows should end, you will use the brow brush to line up the edge of your nostril, with the outer corner of your eye. Place a small dot at the end.  Repeat with other eye.

Grab your brow pencil, and underline the underside of your brows. This part should be more defined. Then, using the arch point you found earlier, draw from the dot, down to connect with the end of the underside line.  You should now have the outer part of your brow out-lined. Next, take your brow pencil and using the powder, begin to fill in the out-lined area, using light brush strokes. Gradually,shading  the pigment into the inner part of your brow. If you need to add more brow powder to the start of your brows, be sure that tap off any excess. You do not want this area to be to dark, or harsh. Then, using a spoolie, begin to brush through your brows to blend the colors.


You may skip this next part, but to get that precise, groomed brow look, I like to use a lighter concealer to the underside of my brows to finish off the look.This will highlight the brow bone and give a nice clean brow line. You may also add a shimmery highlighter to the brow bone to really make it pop!


Read more ...

Tuesday, January 21, 2014

What your missing in your night time skincare routine. By Brittany C., Quad City Makeup Artist

Please read previous post on my recommendations for daytime skincare routines that you should be doing.

As for your night routine:


Many women tell me that they forget to cleanse their skin, and remove their makeup at night. I will tell you that this one of  the worst thing you can do for your skin. It will cause your skin to age faster. Who wants that?  So here's my trick. Try showering at night, and cleanse your face in the shower. Or, once you get into your pajamas and before you get onto that cumfy couch, go cleanse your face! :) Once you sit down and relax, the chances you are going to get up and do your night time regime are slim to none.

1. Cleanse. Thoroughly. Once to remove all that makeup. Then again. Yep, cleanse twice to really get your skin and pores clean.
2. Always. Eye. Cream. :)
3. Next is your serum. This can be the same serum as your a.m. product, or a different product. Again, it all depends on what improvements you want to see in your skin. Most likely, you will use a Retinol, Retin-A, or some form of retinoid anti-aging product. If you are older than 25. then your skin has already began the aging process and it is a great idea to invest in these products.
4. And at last, your moisturizer. Make sure to use one sans-SPF, since you will not be needing this product at night. Most people like to use a heavier cream at night time, since your skin can lose a lot of moisture while sleeping.
Your skin naturally protects itself during the day, and repairs at night. It is so important to give those skin cells the moisture it needs to repair from any damage incurred during the day.


Treatments such as: maskes and exfoliation can be done daily, every couple of days, or once a week. Be sure to know what skin type you have and buy accordingly. If you don't know, or are unsure, many spas and medi-spas offer free skin exams and consultations.


Remember, that every persons' skin is difference so invest in products that suit your skin-type and your skin concerns. 

Thanks for reading, and if you have any questions or comments, please post here or on my site at www.facebook.com/brittanychevellemakeupartist

Read more ...

Tuesday, January 14, 2014

What your missing in your DAYTIME skincare routine by Brittany, QC Makeup Artist

With the copious amount of skincare and makeup products on the market today, it's no surprise that women aren't sure what products to buy, or how to use them...correctly. I know it can be very intimidating, confusing, and leave you running for the door, but fear not, here is a simple step-by-step guide to caring for your skin. No matter if your oily, or dry.

The order in which you apply your skincare products will make the difference of how effective or not effective it can and will be for you.

Starting with your morning routine:

1. If your skin is more normal to dry, a simple warm water rinse would be adequate; assuming that you also cleansed your skin at night. However, if you are more oily and acne-prone, you will want to cleanse your skin in the a.m. regardless. Always cleanse with warm water and never use hot water on your skin. Even for those of you that enjoy hot showers. Just. Don't. Do. It. This will cause a slew of other skin issues.

2  After cleansing, your next step will always be eye cream. You may have the same eye product for both a.m. and p.m. or, two separate products. For example: my a.m. eye cream has SPF in it to give that delicate eye area extra protection from the sun which causes premature aging. The skin around the eyes is much thinner and has fewer oil glands, therefore drying out quicker and accentuating those fine lines. A hydrating, rich eye cream can help. A little goes a long way, so apply half a pea-size to the pad of your ring finger, rub between your two ring fingers, and tap lightly around your orbital bone. Never pull outward and never apply toward the lash line, as all eye creams migrate upward and can cause burning in the eye.

3. The next product you might apply is an anti-aging serum, or acne product: depending on your skin concerns. This is typically a very sheer, thin consistency. For me, I use a hydrating booster that also has anti-aging properties like, vitamin C. If you are more acneic, you might use a benzyl peroxide or salyclic acid treatment at this step.

4. And lastly, your moisturizer. This will lock in moisture and drive all those yummy ingredients in your serum deeper into the skin. If you opt for a moisturizer with SPF, you will be done at this point and can begin with your makeup regime. Some people use the same moisturizer for the am and pm, and if that is the case, you will want to buy a SPF specially for the face to apply after you have applied your moisturizer, and so applying your SPF will be your last step.

The easiest way to remember this, is that your want your SPF closest to the sun so it will always go on last. Make sure to look for a product that has a SPF 30 or higher, anything lower than that will wear off before you even get out of the door. Oh, your makeup has SPF so your good to go, right?! That's just a myth. Unless you apply your makeup like Spackle, then your good to go. :) 

Post by Brittany C
QCA Makeup artist
Thanks for reading, and if you have any questions or comments, please post here or on my site at www.facebook.com/brittanychevellemakeupartist

Read more ...

Sunday, January 5, 2014

Welcome Brittany to the TCOT blog!!! Quad City Makeup Artist

                                                              Meet Brittany Chevelle!

BrittanyChevelleMakeupArtist


Brittany Chevelle, Makeup Artist

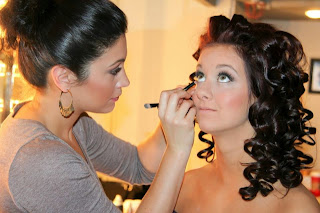
Brittany has always had a "creative bone" in her body. She love's to journal, paint, draw, make crafts, sew, play instruments and last, but not least, her passion: makeup. Everyone has that one hobby or interest that helps them relax and feel at peace, and when Brittany does makeup, it's meditative for her. She started her makeup career professionally with some of the top names in the beauty industry, over 7 years ago. She quickly grew a passion for skincare and it's health, so she went on to study Aesthetics at La James International College. While in school she won several national awards for her makeup applications. After graduating, she worked for a medical spa/dermatologist office for 3 years. There she continued to do makeup for BareMinerals, but mostly helped treat skin problems, such as: acne, hyperpigmentation, dry skin, etc. 

Brittany has gained significant experience over the past 10 years including being involved with: pageants, events, fashion shows and photo shoots. Although she specializes in wedding and special occasion makeup, she loves high-fashion, costume, and everyday makeup looks as well. When she isn't doing makeup for Bridal parties and personal makeup lessons, Brittany enjoys reading and anything to do with the outdoors; including camping, boating and rock climbing. She has been happily married to her husband, Justin, for two years. She also has a fun and vivacious 15 month old daughter, Ellie, and another one due this June. Brittany is quite a social media butterfly, so please feel free to say hi and get in touch via Facebook and visit her facebook page! www.facebook.com/brittanychevellemakeupartist andwww.brittanychevellemakeup.com

BrittanyChevelleMakeupArtist

We are so excited to have Brittany on our Blog as a regular contributor. She already has a great local QCA following because of her impeccable reputation. She has a gift in bringing out the most beautiful features in each person. Follow Brittany's posts to find out more about skincare, makeup, trends, techniques. Feel free to ask some questions too!!!
Read more ...